How to install VirtualBox on Mac
Introduction
Oracle VM VirtualBox is a free application that allows you to run virtual machines (VMs) on your computer through software-based and hardware-assisted x86 virtualization. VirtualBox runs on Windows, macOS, and Linux, and supports a wide array of guest operating systems.
Installing VirtualBox on your Mac
-
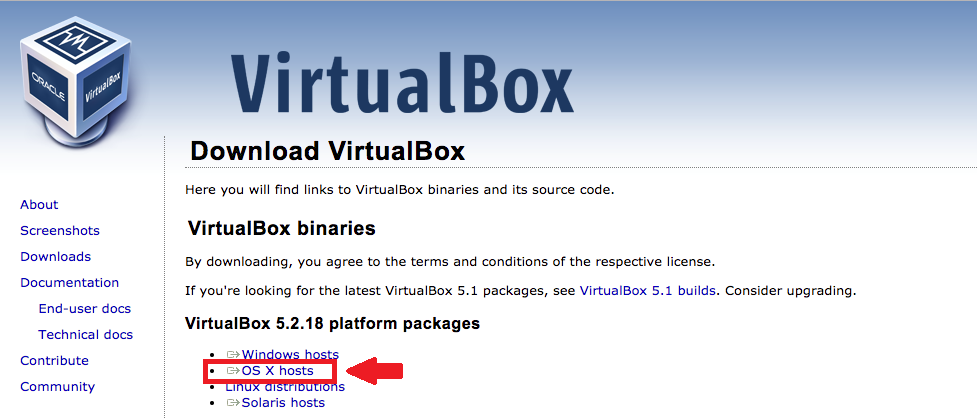
Go to VirtualBox’s download page and click “OS X hosts”. A .dmg file should be downloaded to your “Downloads” folder.
-
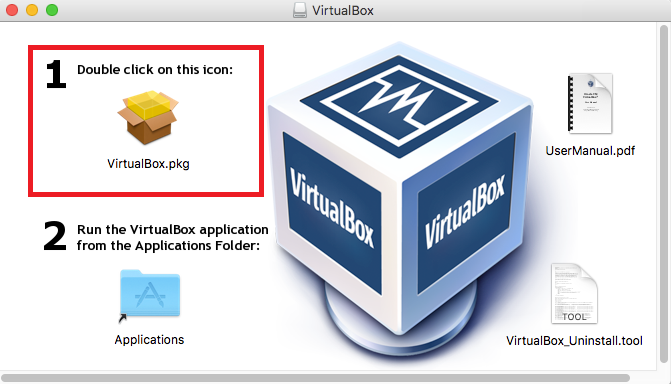
Open the downloaded VirtualBox .dmg file. You will see a screen like this:
-
Double click on “VirtualBox.pkg” to start the installer
-
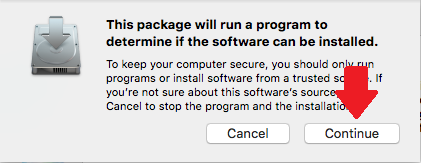
When you see a prompt like below, click “Continue”
-
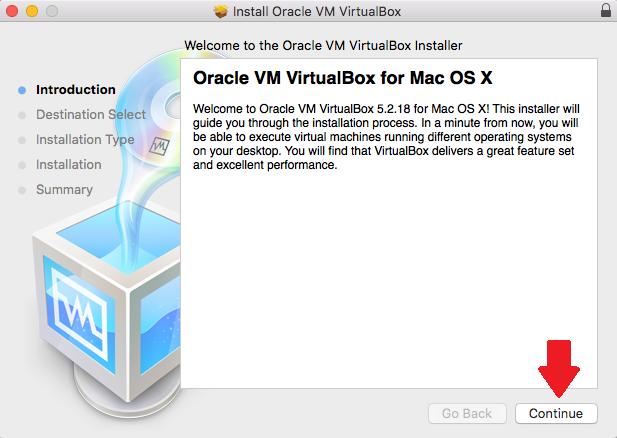
The installer is now open. Click “Continue”
-
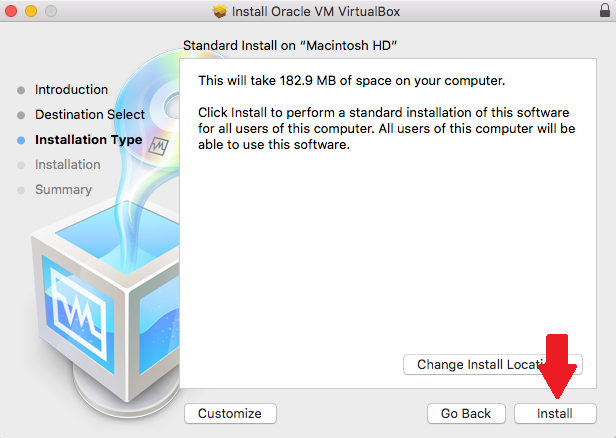
You can change where you want VirtualBox installed, or leave the default option and click “Install”
-
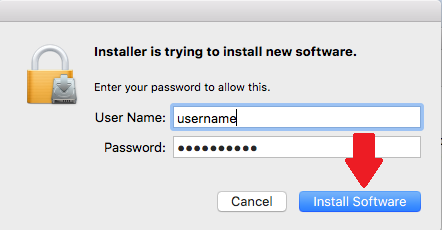
When prompted with an authentication screen, enter the username and password for your user and click “Install Software”
-
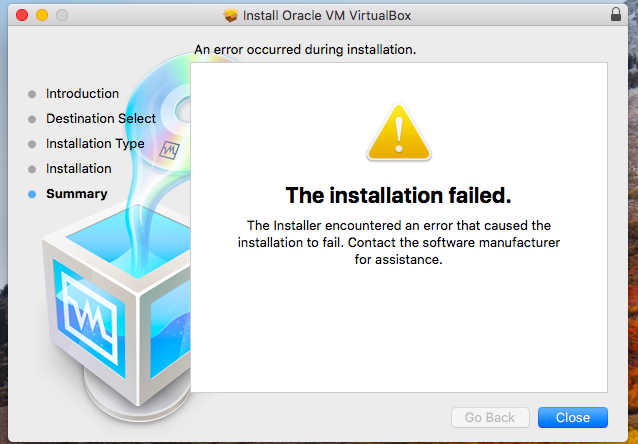
If you see “The installation failed” screen, then the installer was blocked.
-
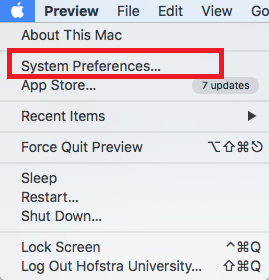
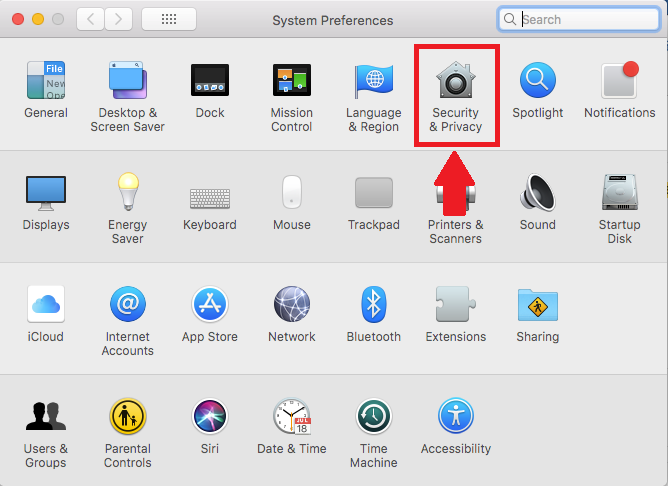
Click on the apple logo in the top left and click “System Preferences”
-
Click the “Security & and Privacy” option
-
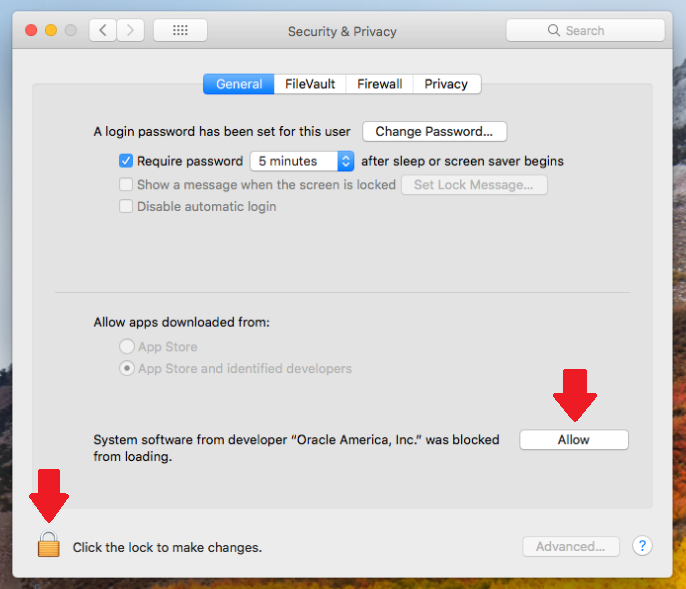
Click the padlock icon to allow you to make changes. Then click “Allow” next to the message that software from “Oracle America, Inc.” was blocked.
-
Rerun the installer the same way as before.
Afer the installation completes, VirtualBox will be in your “Applications” folder.