How to install Git on Windows
Introduction
Git is a free and open source version control system for projets. Git is by far, the most widely used version control system and is useful for any project, no matter the size.
Installing Git on Windows
-
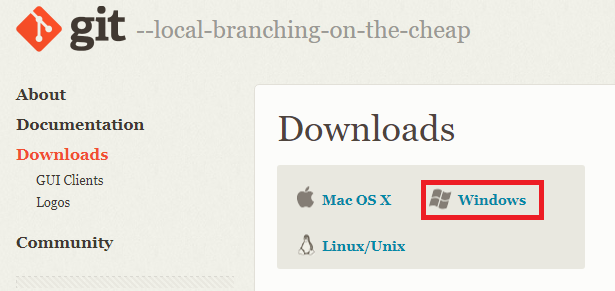
Go to Git’s download page and click “Windows”. An .exe file should be downloaded to your “Downloads” folder.
-
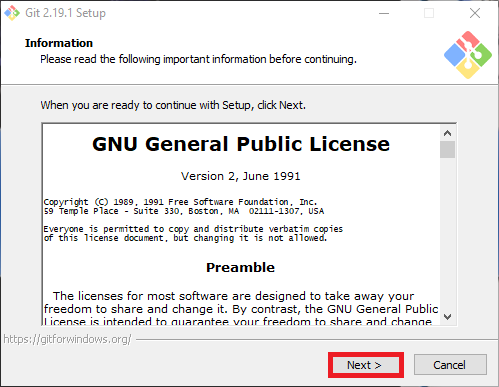
Open the downloaded Git .exe file. You will see a screen containing the license. Click “Next”.
-
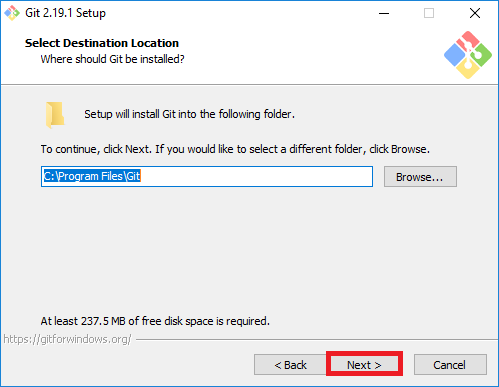
You can change where you want Git installed, or leave the default option and click “Next”.
-
You can choose which components you’d like to be installed with Git, or leave the default options and click “Next”.
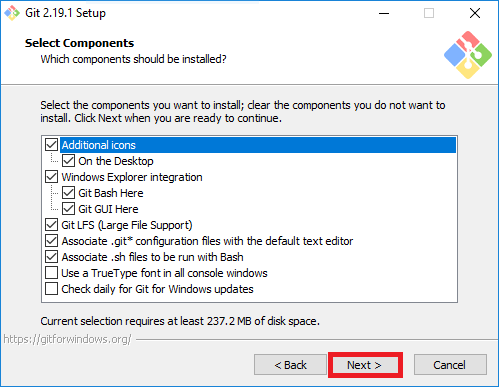
-
You can change the name of the start menu folder created that contains the Git Bash, Git CMD, and Git GUI shortcuts in it. Set a name and click “Next”.
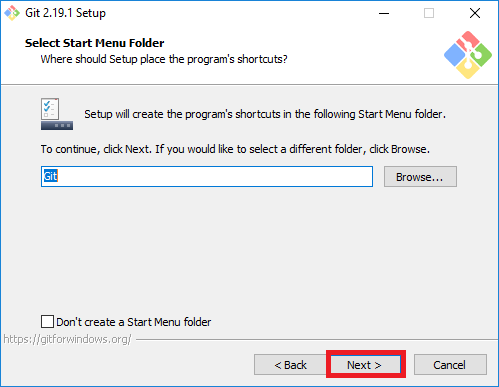
-
Next, you will choose a default editor for Git to use. Select whichever editor you feel most comfortable with and click “Next”.
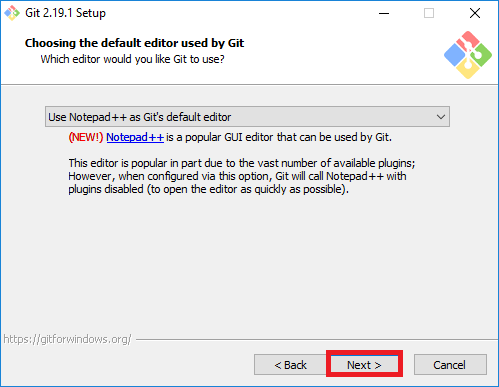
-
Git Bash is a program included in this Git package and can be opened from the start menu. If you would like to also use git commands in the Windows Command Prompt, select the “Use Git from Windows Command Prompt” option. If you do not want this feature, select the “Use Git from Git Bash Only” option. Then click “Next”.
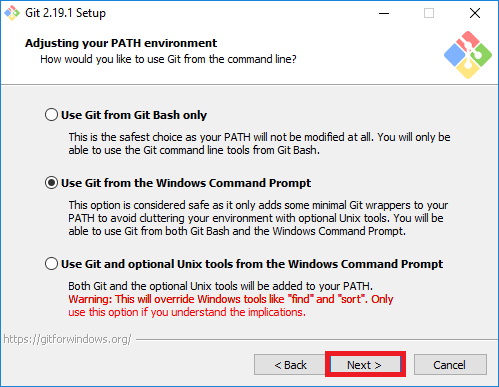
-
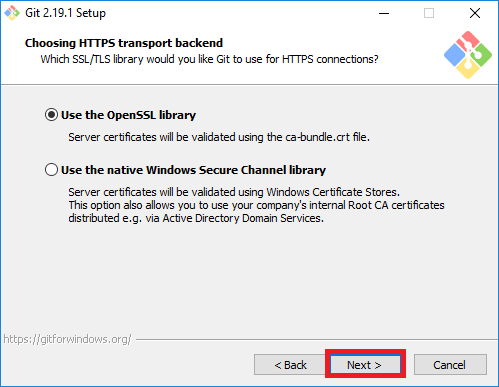
Select “Use the OpenSSL library” and click “Next”.
-
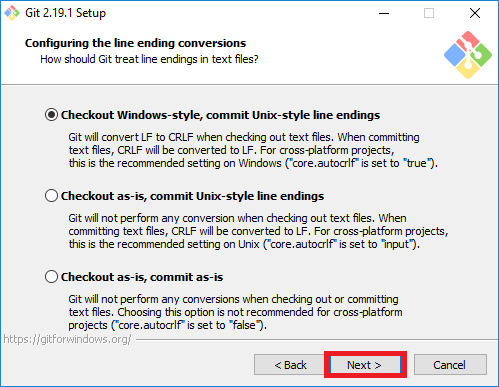
Windows and Unix treat line endings differently. It is safest to select “Checkout Windows-style, commit Unix-style line endings” to avoid any chance of missed conversions. Then click “Next”.
-
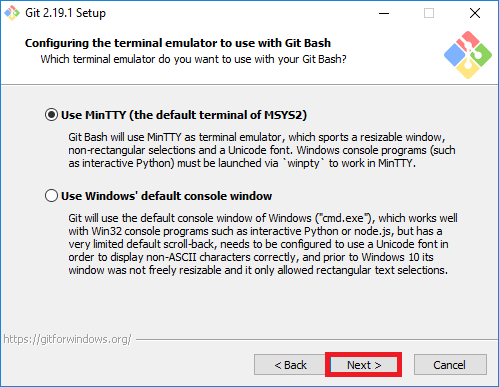
Now select a default terminal emulator for Git Bash. If you are familiar with the Linux command line, then choose the MinTTY terminal emulator. If you are not, then you may consider using Windows’ default console window. Note that Windows’ console window has some limitations including fixed width, limited scrollback, and Non-ASCII characters configuration. If you do not plan on using Git Bash, then you can ignore this and go on to the next step.
-
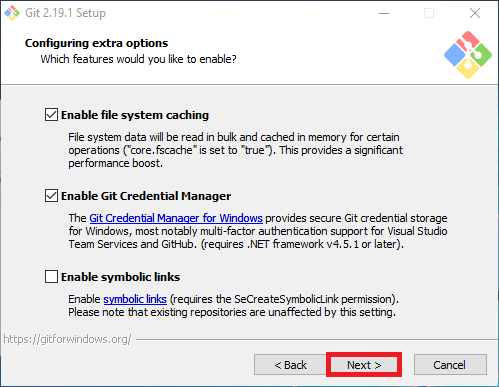
Now we can choose some more available features for Git to support. File system caching will significantly increase performance on git commands in large repositories. Git Credential Manager will allow you to access some git repos using your Microsoft Account instead of https/ssh keys. Git can also support symbolic links, but if you are not familiar with symbolic links, it may be better to leave this option unchecked.
-
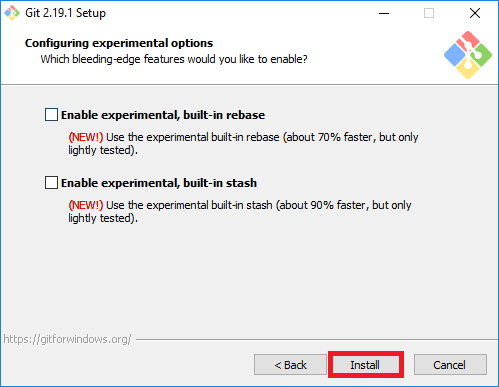
Now we can choose some of the more experimental options that are still in development. Unless you are very familiar with these options, it is better to leave these uncheked. Click “Install” and Git will begin its installation.
-
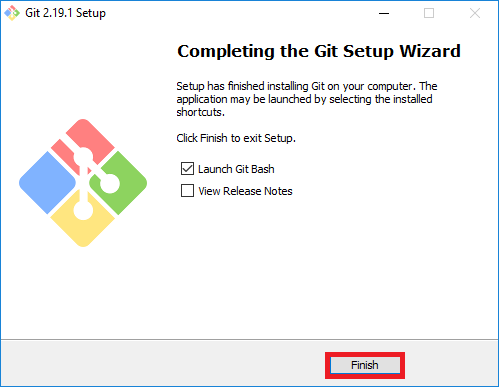
After installation has completed and you see a finish screen, Git will be successfully installed on your Windows computer. You can access it through the start menu. If you want to change any options you selected in the installation process, you can re-run the installer.
